
A Quick and Simple Explanation of the Flip Zone 🎯🔥
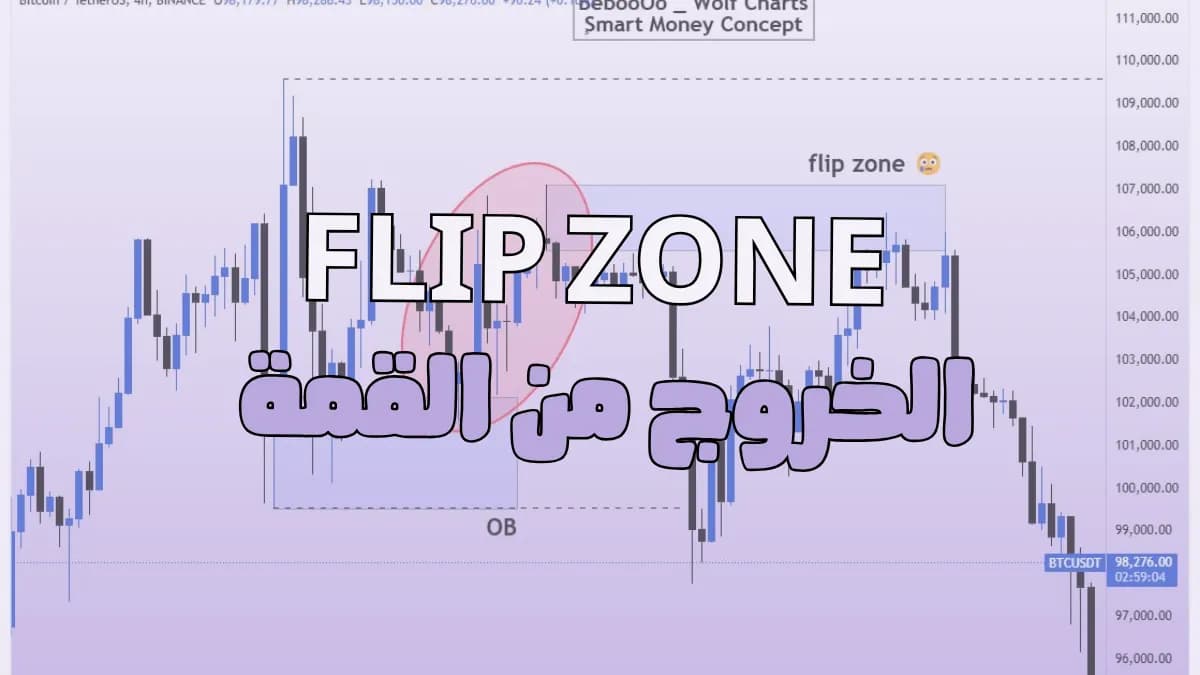
Take a look at the image. 👇

Look at the image.
See that highlighted Order Block (OB)? Price reached it, rejected from it, and created a reaction.
That reaction, highlighted in red, failed to break the previous high, and then price dropped and broke below the Order Block.
The supply zone that formed at the top of that reaction is the Flip Zone. ✔️✔️
The conditions for a Flip Zone to form are: the demand zone fails to break the previous high, and a supply zone forms instead. This newly formed supply zone is called the Flip Zone. 🎯🔥
But keep in mind, not every Flip Zone is strong. There are specific conditions that determine whether the zone will lead to a major drop or just a minor pullback.
The Flip Zone shown in this image is the one we used to anticipate Bitcoin's decline when it was at its peak, making it a useful tool for helping you exit the market.
The most important thing is to train your eye to identify supply zones, demand zones, and Flip Zones, and to observe which zones succeed and which fail. This will help you develop a deeper understanding of the market. 🔥